|
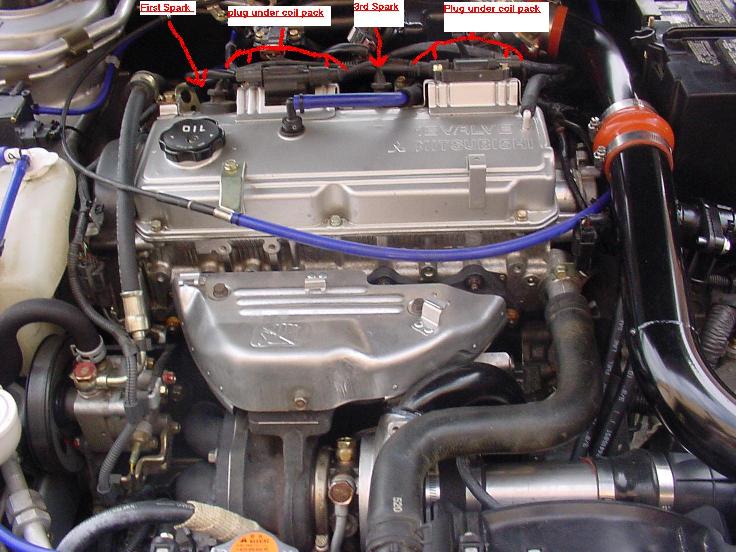
The engine we have in our car is the 4G64. The 99+ Galant and 3G Eclipse RS, GS share the same Engine. Our engines are the newer Versions of the 4G64 Engines that are found in the 94-98 Galant and some of the 2G Eclipse namely the Non-turbo Eclipse Spyder. The difference between the pre 99 ' 4G64's are that they have a distributor cap and the 99+ 4G64 does not, also the pulleys and intake manifold sit facing the opposite side, other then that the engines are the same. The spark
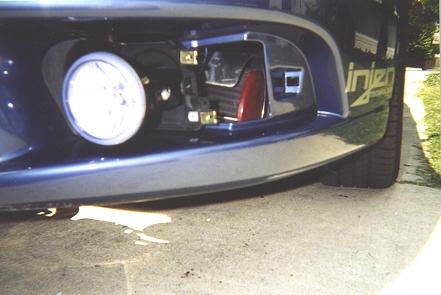
plugs are a little tricky to find. Since our car is distibuteless The coil packs are right after the first spark plug wire and the third wire. Each coil pack is held down in to place by a bolt on each side of the pack. Usually when changing plugs it is a good idea to do one plug at a time, in this case it is easier to pull out all 4 plugs at the same time. Having 2 wires and two coil packs eliminates the problem of getting the wires mixed up easily. Here is a picture of the Engine.
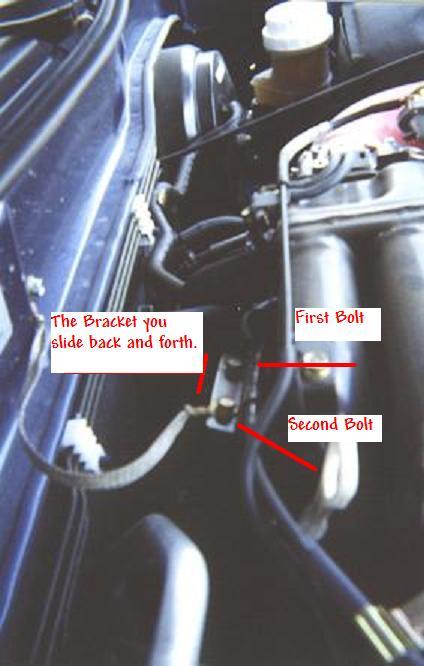
The throttle body adjustment is a great bang for the buck mod because its FREE!!! If your car is feeling a little lag in the throttle response this is a sure fire fix. This won't fix the whole; "wish my car was a m/t instead of a a/t" problem but it will help in that all important reaction off the line problem we have all had in our trusty automatic tranny's. Ok, back around the fire wall is were the TB (throttle body) sits. On the TB is the Throttle cable. Follow the bare wire till it meets plastic and a metal piece with a nut on either side. It almost looks and feels like this is were you are gonna do the tightening but your not. Ok, a little further down like an inch or 2 is a plate that sticks out towards the fire wall. This plate has two bolts and some type of flat ground ribbon on it attached to the fire wall. Unloosen these two bolts enough to slide that plate back and forth. Pull the plate back enough without idling to high, I did mine all the way without having to worry about high Idle. If the idle is high lower it back down. You want the cable firm but not to tight. , then re-tighten the Bolts and VIOLA!!! You are Finished!
First off, I cannot recommend this for anyone else and Shifting manually in your automatic transmission is at your own risk. Ok, so this is how I do it. I start off in Low, then slam the pedal at around 6k, I up shift and then for a split second I release the gas pedal and slam it back down for a hard more aggressive shift. I do this process up to 3rd, by then its all over the race is usually won by then. Slide it up into drive and continue to drive like normal. Again, this I only do when I feel like I might lose the race, normally I just beat them straight up A/T. Remember, you attempt this at your own risk.
This is
easier then it sounds. Taking off the Valve cover is no big deal. Ok, the cover is off. Clean the cover, clean it well. You can sand it lightly with some fine sand paper. I bought some-Red DH1608, Its the Dupli-Color High Heat w/ceramic, its dyno heat tested. I bought this a AutoZone. Its 1200 deg. , I forget the price. Got the paint, ready to paint and follow the directions on the back of the can. After you are finished pop that valve cover on to the engine and you are done.
|